


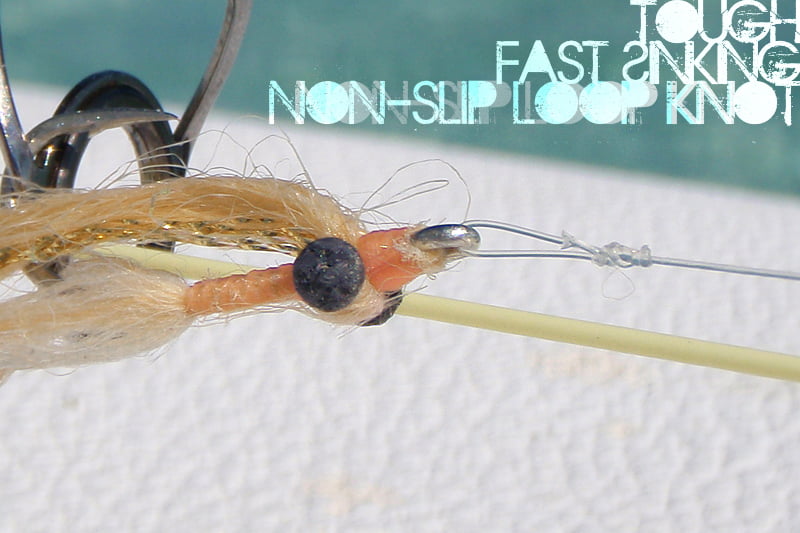
Non-Slip Loop Knot
Why Use a Loop Knot?
When I first began fly fishing for bonefish some years ago, I used a simple Clinch Knot, also known as the “fisherman’s knot.” However, I eventually realized that this simple choice was limiting me. First, it severely minimizes the fly’s movement in the water. Tied to anything heavier than 8-pound tippet my flies looked like they were wired to a stick. Second, this means that—in order to get my flies to move naturally—I was limiting the tippet-strength I was using. This meant I broke off a lot of fish before I ever landed one! Believe me, when you first start bonefishing you’re not looking for records. You just want to land one.
After a while I realized I needed to use a loop knot to get the fly to move naturally in the water. Then I could use heavier tippet and actually land a bonefish. I tried the Uni Knot, but it severely weakened my tippet (breaking below 80% of line strength). What I needed was a strong, easy-to-tie loop knot. Lefty Kreh’s Non-Slip Loop Knot was the ticket. Properly tied it breaks very close to 100% and it’s fairly easy to tie. Bottom line: a loop knot allows for freedom of movement that most other knots can’t compete with… and as a plus you can use heavier tippets, which is a very good thing when fighting a bonefish.
Step-By-Step
How to Tie the Non-Slip Loop Knot
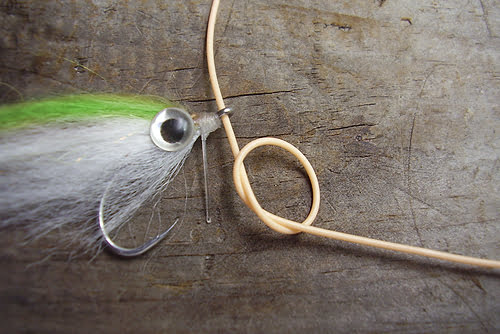
Step 1
Make a simple over-hand knot and slip the tag-end through the hook eye. Leave yourself about 2 inches of this tag-end when you first start tying this knot.
………………

Step 2
Pass the tag-end back through the knot the way it came. (If the hook were not there you’d be untying the knot.)
………………
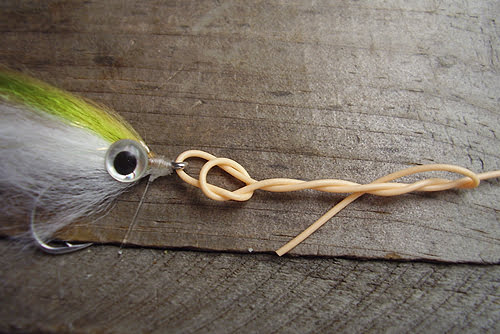
Step 3
Take the tag end and make 5 (not 4, not 6) overhand wraps around the standing part of the line. (The number of wraps is dependent on the size of the tippet. For bonefish tippet of 10-20 pound test, 5 wraps are essential for full strength).
………………
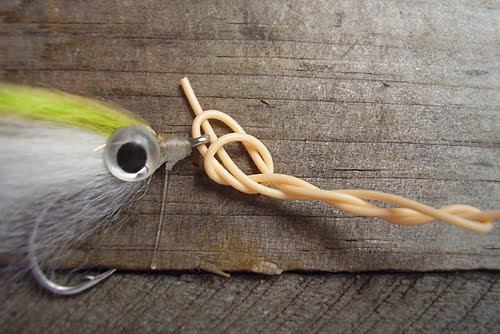
Step 4
Again, pass the tag-end back through the overhand knot the same way it came out. (All entrances and exits should be on the same side of the original knot!)
………………

Step 5
Finally, hold the standing part of the line and pull on the tag-end after moistening the knot. After the knot is seated, pull on the standing part and then pull firmly on the tag-end again to finish. Clip the tag but leave about ⅛-inch tag extending. This knot draws up when a running fish pulls on it; a close-trimmed tag end will pull through!
………………
FISH BONES, Guided Fly Fishing is a private guide service located on the island of Grand Cayman. We specialize in wading fly fishing for bonefish and tarpon, with over 15 years of experience guiding and teaching anglers to fly fish the flats. Catch-and-release, sustainable sport-fishing. 100% Local!